It’s an in-between time. I’ve finished teaching my spring courses, but I’m still reading final papers, grading exams, and clearing my desk for summer research (and cooking). The stalls at the farmers’ market have asparagus, rhubarb, and spring greens alongside scruffy apples and potatoes. Spring flowers and green leaves promise warmth, but it’s been a chilly, rainy week. Although I love spring sunshine, a gray Saturday was a perfect opportunity to cook a shoulder of lamb stuffed with oysters.


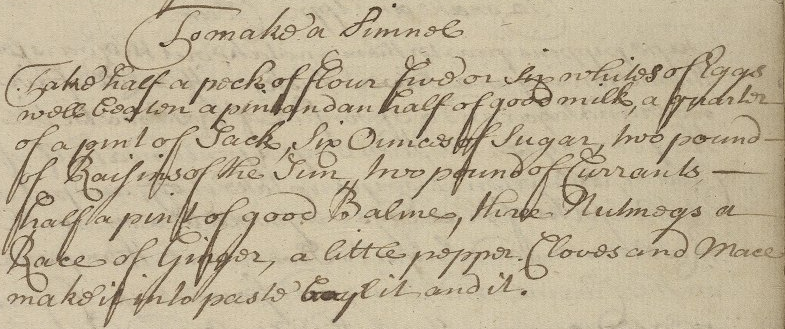
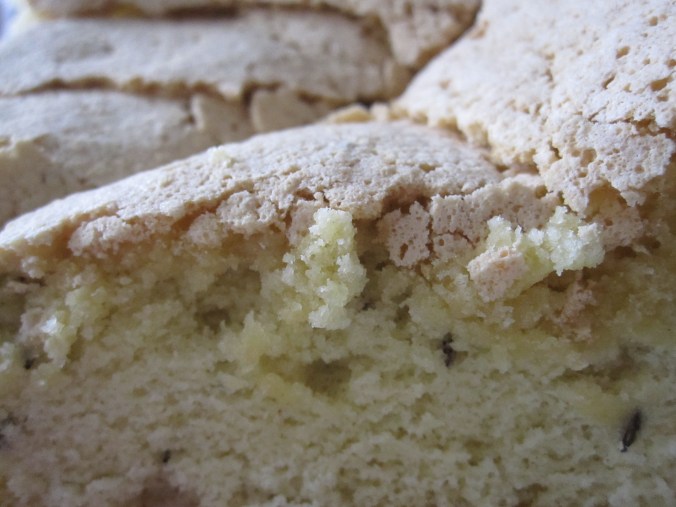
I found this recipe back in the fall and I immediately knew I wanted to try it. I love lamb, I love oysters, and I’d never eaten anything like this. The recipe is from MS Codex 785 and this manuscript also includes the Simnel I made at Easter and the biskets that formed the base for Bisket Pudding. Compiled in the late seventeenth and early eighteenth century, MS Codex 785 includes some complex culinary recipes along with standard items (biskets, dumplings, pancakes). This recipe’s combination of meat and seafood, mutton and oysters, is not entirely unusual in early modern culinary manuscripts. Sauces and stuffing rich with anchovies, for example, appear in preparations for chicken and other meats, too.
The Recipe
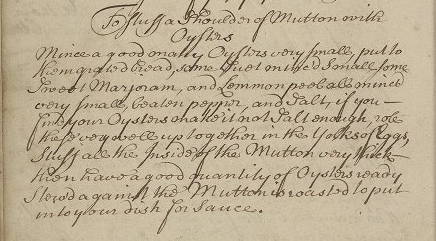
To stuff a Shoulder of Mutton with Oysters
Mince a good many Oysters very small, put to
Them grated bread, some suet mince’d small some
Sweet marjoram and lemmon peele all mince’d
Very small, beaten pepper, and salt if you
Find your oysters make it not salt enough, role
These very well up together in the yolks of eggs
Stuff all the inside of the Mutton very thick
Then have a good quantity of oysters ready
Stew’d against the Mutton is roasted to put
Into your dish for Sauce.
On a frigid day a few months ago, I purchased a frozen shoulder of lamb from the Livengood Farm stall at my local farmers’ market. If they had had mutton (an older sheep), which they sometimes do, I would have bought it instead. It’s often cheaper! I mention all this because until I defrosted the lamb shoulder on Saturday I had no idea what kind of bones were in my roast. In addition to the blade bone, there were also ribs in this roast which is sort of unusual. (Here’s a great YouTube video about how to remove the blade bone from a shoulder of lamb.) After much deliberation about the ribs, and assistance from my spouse Joseph, I decided to stuff, tie, and roast the lamb shoulder with the bones in. This dish will be easier to prepare and serve if you, or your butcher, bone your lamb shoulder before you start. The modern recipes for stuffed lamb shoulder from Julia Child and Hugh Fearnley Whittingstall that I consulted in search of cooking times, all suggest starting this way. Here are recipes from Hugh, lamb shoulder roasted whole and stuffed lamb shoulder, and Julia braised stuffed lamb shoulder.
The oysters delayed me for a while. I didn’t want to shell-out for “a good many” gorgeous raw oysters only to chop them into a stuffing. But I also found the cooked and canned options vexing. I’ve purchased many cans of boiled clams over the years to bulk out a favorite pasta dish, but at first I could only find small, expensive cans of smoked oysters. I wasn’t sure if the smoked oyster flavor and texture would work in this dish. After some supermarket sleuthing, I found a can of boiled oysters and a small container of stewing oysters at a Reading Terminal Market fishmonger stall. I was finally ready to cook.
Although the oysters make this stuffing distinct, I could certainly taste the marjoram and lemon. Marjoram, a member of the oregano family, pairs wonderful with rich meats like lamb. I used grated beef suet in my stuffing because I had some in the freezer from when I made minced pies, but butter will certainly work in its place.
The end of this recipe mentions an oyster sauce. I added a few oysters to the roasting pan assuming that they might cook in excess lamb fat and form the basis of a wonderful gravy. However, the stuffing soaked up all the lamb’s juices and the pan oysters were desiccated. (They had a jerky-like flavor and consistency and, honestly, they were delicious.) Since I didn’t have any extra oysters on hand, I did not attempt to serve this roast lamb with an oyster sauce. I’ve draft a provisional recipe for this garnish below if you’re interested in trying it. Next time I will buy more oysters!


Our Recipe
butcher’s twine
1 shoulder lamb or mutton (mine weighed 2 lbs, including bones)
8-12 oz raw or cooked oysters, chopped (I used an 8 oz can of boiled oysters and 3 oz of fresh, stewing oysters. If you have abundant, cheap, fresh oysters available to you, by all means use those instead!)
2 cups stale bread, chopped into small pieces
3T breadcrumbs
10 T beef suet, grated OR 8 T butter, cut into small pieces and left to come to room temperature
2 T fresh marjoram, roughly chopped (2T fresh oregano will also work. In a pinch, 2 t dried oregano might be a decent substitute if you can’t find fresh.)
Zest of one lemon
1 t ground black pepper plus more for coating the roast
3 egg yolks
Salt to taste
*oyster sauce to serve
Clean and prepare your lamb or mutton shoulder for stuffing.
Preheat your oven to 425F.
If you are using fresh chopped oysters, you may want to saute them in butter for a minute before adding them to the stuffing mix. This stuffing is not cooked before use like many modern stuffings.
Prepare stuffing. Mix bread, breadcrumbs, suet, chopped oysters, marjoram, lemon zest, and pepper. Taste test to see if you need more salt. Mix with egg yolks to soften. If your stuffing is dry and isn’t combining in glorious squishyness, add more butter or another egg yolk.
Stuff the lamb shoulder. Using butcher’s twine, tie the roast at one-inch intervals and place it in a roasting dish. Dress the lamb with pepper and salt. I added a few whole oysters to the pan and balls of leftover stuffing.
Roast at 425F for a half hour to brown the meat. Then turn the oven down to 325F and roast for another 30-60 minutes (depending on your preference for rare to well-done lamb). My roast needed 50 minutes at 325F. Rest 20 minutes before carving. Serve something green, something starchy, and maybe oyster sauce.
* A speculative recipe for oyster sauce, which I did not make: Cook 3 oz fresh oysters in 2T butter. Season with marjoram, black pepper, and salt to taste. Serve with the cooked roast.
The Results
The lamb was moist and rich, the stuffing was herbaceous, mineral, and fishy with oysters. Now I want to stuff all the lamb. Joseph and I ate this as an elaborate weekend lunch with roast carrots and turnips, grilled asparagus, and my sourdough bread. It was a perfect, in-between, spring meal. Give this recipe a try on a rainy spring day before the strawberries show up at the market and the summer heat kicks in.


You must be logged in to post a comment.